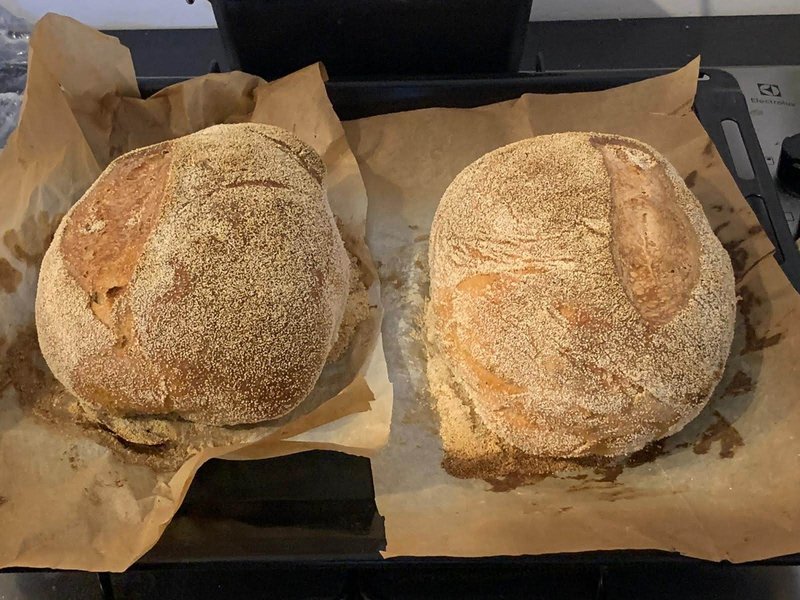
A third whole wheat flour gives the bread a nutty flavor, a thicker crust and a moist crumb, and it still stays airy. The recipe makes two loaves, one to eat this week and one for the freezer.
Feed the starter and use it when it has doubled in volume, after 4–6 hours.
2
Mix the whole wheat flour and white flour with 3 cups of the water until no dry flour remains, cover and let rest 60 minutes (autolyse).
💡Autolyse lets the flour absorb the water before the starter and salt: the gluten develops on its own, and the kneading is shorter.
3
Add the starter and squish it into the dough with your fingers.
4
After 30 minutes, add the salt and the rest of the water and pinch the dough until the water is absorbed.
5
Leave the dough in a covered bowl 2 hours at room temperature, folding it every half hour, four rounds.
Bowl
💡Folding: pull one side of the dough up and fold it over itself, turn the bowl and repeat from all four sides. This strengthens the dough without kneading.
6
Leave the dough 2–3 hours more, until it has risen by about half, there are bubbles on the sides and it jiggles when you shake the bowl.
7
Divide the dough in two and shape each piece into a tight ball. Place in floured proofing baskets, seam side up, cover and refrigerate 12–16 hours.
Proofing basket (banneton)Refrigerator
8
Preheat the oven to 250°C (480°F), with a cast-iron pot inside, 45 minutes.
⚙ Preheating the OvenOven
💡Put things in the oven only once it's reached temperature, after the heating light has gone off: an oven that hasn't reached temperature changes baking times, and the bake burns outside or stays underbaked.
9
Turn one loaf out onto parchment paper, dust it generously with the flour and cut one long slash, about 1 cm deep, near the side. Lower the dough into the pot using the paper.
Parchment paperCast-iron potKnife
10
Bake in the covered pot 20 minutes, until the bread rises. Remove the lid, lower the heat to 230°C (445°F) and bake 22–25 more minutes, until the crust is deep brown. Repeat with the second loaf.
⚙ BakingOvenCast-iron pot
💡The covered pot traps the dough's steam during the first half: the crust stays soft, and the bread rises fully before it hardens.
💡Check by the cue (until…), not just the clock: every oven bakes a little differently.
11
Cool completely on a rack, at least 2 hours, before slicing.
Cooling rack
💡Hot bread is still baking inside in its own steam: an early slice comes out gummy, and the crust softens.
228calories
7 gprotein
45 gcarbs
1 gfat
● protein 13%● carbs 83%● fat 4%
Per serving (125 g), of 16 servings
A button hides that part of the recipe, in print too. Another click brings it back. The choice is kept for this recipe.
Oven· 💡 Workaround, changes the dish: Toaster oven (Fits one small pan; good for small batches) · Air fryer (Small batches only, no runny batters) · Pot (Only for covered stews on the stovetop, no browning on top)
Refrigerator· Also works: Freezer (Chills faster; don't let it freeze) · Ice bath (Ice bath)
Cast-iron pot· Also works: Pot (Holds less heat, burns on the bottom) · Glass / ovenproof baking dish (In the oven, covered with foil)
Cooling rack· Also works: Oven rack (Oven rack)· 💡 Workaround, changes the dish: Plate (Bottom sweats and softens)
Proofing basket (banneton)· Also works: Bowl (Bowl lined with a floured towel)
Knife· Also works: Food processor (Fast, less control over size) · Kitchen shears (For herbs/dough)
Bowl· Also works: Pot (None)
🧻 Consumables: Parchment paper
By the steps, as the recipe is built now: another version or addition can change the list.