Mix the flour, yeast, sugar and salt in a large bowl.
Bowl
2
Add the lukewarm water and olive oil and Knead about 10 minutes, until the dough is smooth, pliable and doesn't stick to your hands.
BowlStand mixer
💡For yeast dough, use the windowpane test: a small piece stretches into a thin, translucent sheet without tearing, and that's the sign the kneading is done. Add flour only by the tablespoon, and only if the dough is still sticky after a few minutes: too much flour makes a tough dough.
3
Cover and Let rise about an hour in a warm place, until the dough doubles in size.
Plastic wraporKitchen towel
💡Let rise in a warm, draft-free spot. The dough is ready when it has doubled, and a gentle finger press leaves a dent that fills back slowly; if it springs right back, wait longer.
4
Preheat the oven to 250°C (480°F), with an upside-down baking sheet inside, for at least half an hour.
Oven
💡Put things in the oven only once it's reached temperature, after the heating light has gone off: an oven that hasn't reached temperature changes baking times, and the bake burns outside or stays underbaked.
5
Divide the dough into 10 balls and roll each ball into a circle about ½ cm thick.
Rolling pin
💡Don't roll too thin: in a round half a centimeter thick or more, the steam in the dough puffs it into a pocket; a round that's too thin dries into a cracker.
💡Dough that springs back needs rest: cover the balls for 10 minutes and the gluten relaxes.
6
Cover the rounds with a towel and let rest 15 minutes.
Kitchen towel
7
Bake on the hot baking sheet, 3–4 pitas at a time, 3–5 minutes, until the pitas puff into a pocket and take on a little color.
OvenBaking sheet
💡Full heat and a scorching-hot baking sheet are what make the pocket: in an oven that isn't hot enough, the pita bakes flat.
💡Check by the cue (until…), not just the clock: every oven bakes a little differently.
8
Wrap immediately in a towel, so the pitas stay soft.
Kitchen towel
For the Tahini sauce
9
Mix the tahini, lemon juice and garlic and season with salt.
10
Gradually add cold water while stirring, until the sauce is smooth, pale and pourable.
💡When you add the first water, the tahini thickens and looks like dough: that's fine. Keep adding water and stirring, and it loosens into a smooth sauce.
To assemble
11
Heat the oil in a deep pot and fry the eggplant slices in it until golden, and drain on paper towels.
StoveSlotted spoonCandy/oil thermometerDeep pot for frying
💡Fry eggplant for sabich until golden and completely soft, and drain well: it soaks up oil, and the paper draws out the excess.
💡Keep the oil at 170–180°C: too cold, and the food soaks up oil; too hot, and it browns outside before the inside cooks. Without a thermometer, dip the tip of a wooden spoon in the oil: when medium bubbles form around it right away, the oil is hot enough.
💡Don't overload the oil: every piece that goes in cools it down. Fry one piece as a test, then the rest in several batches, and transfer to paper towels.
12
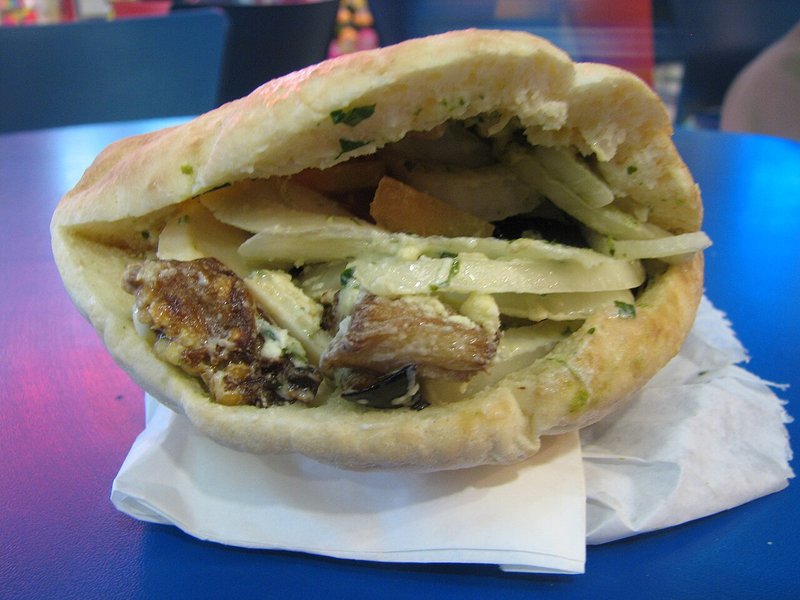
Open the pitas and spread tahini sauce inside.
13
Arrange the eggplant and slices of hard-boiled egg in the pita.
14
Add the amba, schug, salad and pickles.
460calories
19 gprotein
33 gcarbs
25 gfat
● protein 18%● carbs 30%● fat 52%
Per serving, servings (calculated for this version)
A button hides that part of the recipe, in print too. Another click brings it back. The choice is kept for this recipe.
⚖ About the ingredients
Tahini sauce: measured in cup in this recipe: 1 cup = 240 g · 665 kcal per 100 g · More about Tahini sauce →
Lemon juice: measured in tbsp in this recipe: 1 tbsp = 15 g · 21 kcal per 100 g · More about Lemon juice →
Garlic: measured in pieces: one ≈ 5 g · 149 kcal per 100 g · More about Garlic →
Zhug (s'chug): measured in tbsp in this recipe: 1 tbsp = 15 g · 40 kcal per 100 g · More about Zhug (s'chug) →
Pickles: measured in pieces: one ≈ 50 g · 12 kcal per 100 g · More about Pickles →
🔧 Tools needed (3) · 🍳 One cooking vessel
Stove· 💡 Workaround, changes the dish: Portable hot plate (one weaker burner) · Camping gas stove (One burner, outdoors) · Electric pressure cooker (multicooker) (One pot, no real shallow frying)
Deep pot for frying· Also works: Electric deep fryer (None) · Wok (Less oil, less stable)
Slotted spoon· Also works: Spider strainer (None) · Tongs (For large pieces)
Helps, not needed: Candy/oil thermometer
By the steps, as the recipe is built now: another version or addition can change the list.