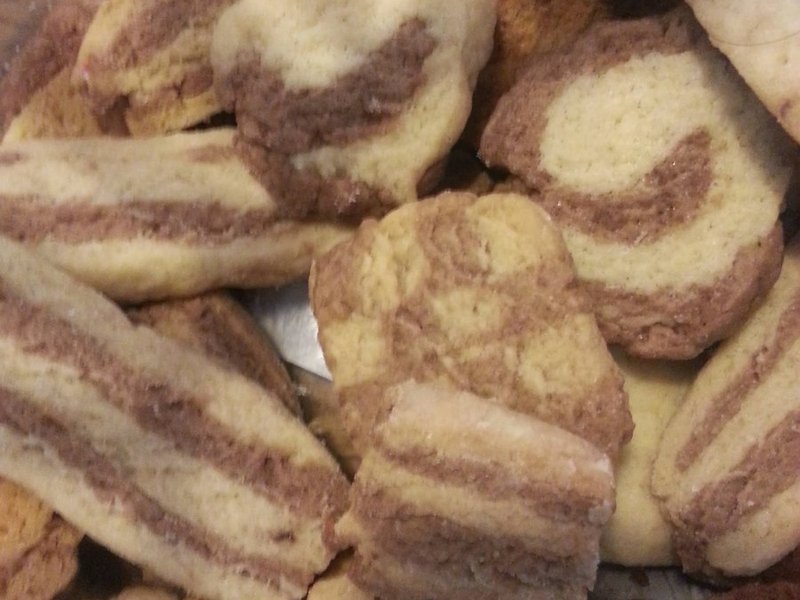
A crisp butter dough in two colors rolled together and sliced, so every cookie comes out with a slightly different marble pattern. Make the log ahead, keep it in the freezer and bake as many as you need.
⏱ 49 min🍽 about 40 cookies🌍 Israeli👩🍳 Afoona🧩 2 parts
Preheat the oven to 175°C (345°F) and line a baking sheet with parchment paper.
⚙ Preheating the OvenOven
💡Put things in the oven only once it's reached temperature, after the heating light has gone off: an oven that hasn't reached temperature changes baking times, and the bake burns outside or stays underbaked.
2
Whip the soft butter with the powdered sugar, to a smooth, pale mixture.
⚙ WhippingBowlHand mixerorStand mixerorWhisk
💡Cream the butter soft, at room temperature: cold butter doesn't take in air, and melted butter doesn't hold it.
3
Add the yolks and vanilla and mix well.
4
Add the flour and salt and mix just until a dough forms.
💡Mix in the flour only until a dough forms: long kneading develops gluten, and the cookies come out hard instead of crumbly.
5
Divide the dough in two and knead the cocoa and the milk into one half.
Bowl
6
Roll out both doughs, each one between two sheets of parchment paper into a 20 by 30 cm rectangle.
⚙ Rolling Out DoughRolling pinParchment paper
💡Roll from the center outward and give the dough a quarter turn between rolls: this keeps it even in thickness and stops it sticking to the counter. If it springs back, cover for 10–15 minutes and try again.
7
Lay the light dough on the dark one and roll up tightly from the long side.
8
Wrap the roll in plastic wrap until it holds together and chill 45 minutes.
⚙ Wrapping and Chilling the DoughPlastic wrapRefrigerator
9
Slice the roll with a sharp knife into 7 mm-thick cookies and arrange on the baking sheet, spaced apart.
KnifeCutting boardBaking pan
10
Bake 12–14 minutes, until the edges of the light part start to turn golden.
⚙ BakingOvenBaking pan
💡Take the cookies out while they still look soft: they firm up as they cool, and long baking dries them out.
💡Check by the cue (until…), not just the clock: every oven bakes a little differently.
11
Cool 10 minutes on the pan: the cookies firm up as they cool.
95calories
1 gprotein
10 gcarbs
6 gfat
● protein 5%● carbs 42%● fat 52%
Per serving (21 g), of 40 servings
To assemble ·
A button hides that part of the recipe, in print too. Another click brings it back. The choice is kept for this recipe.
Vanilla extract: measured in tsp in this recipe: 1 tsp = 4.2 g · 288 kcal per 100 g · More about Vanilla extract →
White flour: measured in cup in this recipe: 1 cup = 125 g · 364 kcal per 100 g · More about White flour →
Salt: measured in tsp in this recipe: 1 tsp = 6 g · 0 kcal per 100 g · More about Salt →
Cocoa powder: measured in tbsp in this recipe: 1 tbsp = 5.4 g · 228 kcal per 100 g · More about Cocoa powder →
Milk: measured in tbsp in this recipe: 1 tbsp = 15 g · 60 kcal per 100 g · More about Milk →
🔧 Tools needed (8) · 🍳 One cooking vessel
Oven· 💡 Workaround, changes the dish: Toaster oven (Fits one small pan; good for small batches) · Air fryer (Small batches only, no runny batters) · Pot (Only for covered stews on the stovetop, no browning on top)
Refrigerator· Also works: Freezer (Chills faster; don't let it freeze) · Ice bath (Ice bath)
Baking pan· Also works: Glass / ovenproof baking dish (None) · Disposable pan (None)
Rolling pin· Also works: Glass (for drinking/serving) (Bottle/glass, less even rolling) · Pasta machine (For pasta dough)
Cutting board· Also works: Plate (Large plate, dulls the knife)
Knife· Also works: Food processor (Fast, less control over size) · Kitchen shears (For herbs/dough)
Bowl· Also works: Pot (None)
Hand mixer or Stand mixer or Whisk· one of them
🧻 Consumables: Parchment paper · Plastic wrap
By the steps, as the recipe is built now: another version or addition can change the list.