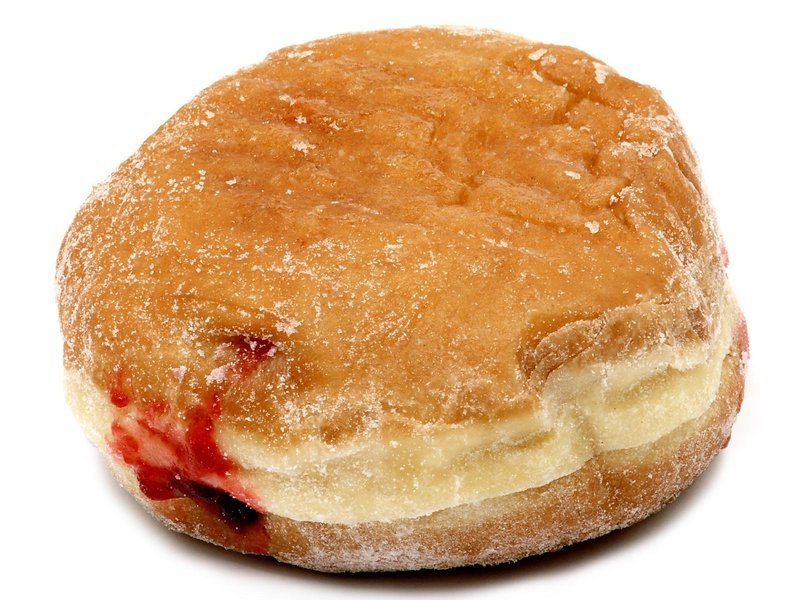
Mix the flour, yeast, sugar and salt in a large bowl.
Bowl
2
Add the lukewarm milk, eggs and butter and Knead about 8 minutes, until the dough is smooth, pliable and doesn't stick to your hands.
⚙ KneadingBowlStand mixer
💡For yeast dough, use the windowpane test: a small piece stretches into a thin, translucent sheet without tearing, and that's the sign the kneading is done. Add flour only by the tablespoon, and only if the dough is still sticky after a few minutes: too much flour makes a tough dough.
3
Cover and Let rise 1 hour at room temperature, until the dough doubles in size.
⚙ ProofingPlastic wraporKitchen towel
💡Let rise in a warm, draft-free spot. The dough is ready when it has doubled, and a gentle finger press leaves a dent that fills back slowly; if it springs right back, wait longer.
For the Cream Filling
4
Heat the milk to just below a boil.
StovePot
5
In a bowl, whisk the egg yolks, sugar and flour.
BowlWhisk
6
Pour the hot milk in a thin stream into the mixture, whisking constantly.
⚙ Tempering eggsWhisk
💡The hot liquid goes into the eggs slowly while whisking, and only about a third of it in the first batch: that way they warm gradually and don't turn into scrambled eggs.
7
Return to the pot and cook over medium heat, stirring constantly, until the cream thickens and bubbles in the center, then cook 1–2 more minutes.
StovePot
💡Stir nonstop until it bubbles: only then does the starch thicken fully, and the cream won't turn runny later.
8
Add the vanilla and stir.
9
Transfer to a bowl, cover with plastic wrap touching the surface of the cream and let cool.
BowlPlastic wrap
To assemble
10
Roll out the dough on a floured surface to 1.5 cm thick and cut out 7 cm rounds.
⚙ Rolling Out DoughRolling pinCookie cutter
💡Roll from the center outward and give the dough a quarter turn between rolls: this keeps it even in thickness and stops it sticking to the counter. If it springs back, cover for 10–15 minutes and try again.
11
Arrange the rounds on a baking sheet lined with parchment paper, cover with a towel and Let rise another 30 minutes.
⚙ ProofingPlastic wraporKitchen towelKitchen towelBaking pan
💡The second rise, after cutting, is what makes an airy doughnut: a round that didn't rise again comes out dense and greasy. On a square of paper it goes into the oil without losing its shape.
12
Heat the oil in a wide pot to 170°C (340°F) and lower the rounds into the oil. Fry 2–3 minutes per side, until a pale ring forms around the middle, and transfer to paper towels.
💡Oil that's too hot browns the outside before the center cooks: fry at a measured temperature, and a lid on the first side steams the dough and gives the pale ring.
💡Keep the oil at 170–180°C (340–355°F): too cold, and the food soaks up oil; too hot, and it browns outside before the inside cooks. Without a thermometer, dip the tip of a wooden spoon in the oil: when medium bubbles form around it right away, the oil is hot enough.
💡Don't overload the oil: every piece that goes in cools it down. Fry one piece as a test, then the rest in several batches, and transfer to paper towels.
13
Fill a piping bag with the custard, insert its tip into the side of each sufganiyah and squeeze in a little filling.
Piping bag
14
Dust the powdered sugar over the top.
Sifter
501calories
11 gprotein
50 gcarbs
28 gfat
● protein 9%● carbs 40%● fat 51%
Per serving (192 g), of 8 servings
For the Dough base · For the Cream Filling · To assemble ·
A button hides that part of the recipe, in print too. Another click brings it back. The choice is kept for this recipe.
⚖ About the ingredients
Flour: measured in cup in this recipe: 1 cup = 120 g · 364 kcal per 100 g · More about Flour →
Milk: measured in cup in this recipe: 1 cup = 244 g · 60 kcal per 100 g · More about Milk →
Dry yeast: measured in tsp in this recipe: 1 tsp = 4 g · 325 kcal per 100 g · More about Dry yeast →
Sugar: measured in tbsp in this recipe: 1 tbsp = 12 g · 387 kcal per 100 g · More about Sugar →
Salt: measured in tsp in this recipe: 1 tsp = 6 g · 0 kcal per 100 g · More about Salt →
Eggs: measured in pieces: one ≈ 50 g · 143 kcal per 100 g · More about Eggs →
Butter: measured in tbsp in this recipe: 1 tbsp = 14 g · 717 kcal per 100 g · More about Butter →
Vanilla extract: measured in tsp in this recipe: 1 tsp = 4.2 g · 288 kcal per 100 g · More about Vanilla extract →
Canola oil: measured in cup in this recipe: 1 cup = 216 g · 884 kcal per 100 g · More about Canola oil →
Powdered sugar: measured in tbsp in this recipe: 1 tbsp = 8 g · 389 kcal per 100 g · More about Powdered sugar →
🔧 Tools needed (13) · 🍳 3 cooking vessels
Stove· 💡 Workaround, changes the dish: Portable hot plate (one weaker burner) · Camping gas stove (One burner, outdoors) · Electric pressure cooker (multicooker) (One pot, no real shallow frying)
Pot· Also works: Deep skillet (sauté pan) (less liquid, faster evaporation)· 💡 Workaround, changes the dish: Wok (For quick cooking)
Wide, shallow pot· Also works: Deep skillet (sauté pan) (None)· 💡 Workaround, changes the dish: Pot (Layers instead of a single layer)
Baking pan· Also works: Glass / ovenproof baking dish (None) · Disposable pan (None)
Piping bag· Also works: Zip-top bag (Zip-top bag with a corner cut off, no tip)· 💡 Workaround, changes the dish: Spoon / teaspoon (regular) (With a spoon, uneven)
Rolling pin· Also works: Glass (for drinking/serving) (Bottle/glass, less even rolling) · Pasta machine (For pasta dough)
Sifter· Also works: Fine sieve (None) · Whisk (Whisk the dry ingredients well instead of sifting)
Bowl· Also works: Pot (None)
Kitchen towel· Also works: Plastic wrap (Plastic wrap over the bowl) · Paper towels (None)
Slotted spoon· Also works: Spider strainer (None) · Tongs (For large pieces)
Tongs· Also works: Turner (None)· 💡 Workaround, changes the dish: Fork (Pierces the meat)
Whisk· Also works: Hand mixer (None)· 💡 Workaround, changes the dish: Fork (Beat with a fork, less air)
🧻 Consumables: Plastic wrap
Helps, not needed: Stand mixerCandy/oil thermometer
By the steps, as the recipe is built now: another version or addition can change the list.